Showing posts with label Storage. Show all posts

Saturday, August 23, 2014

Animal-Proofing Seed Cans


My wife worked at Wild Birds Unlimited for quite a few years before our kids were born.  During that time, she got into the habit of keeping a backyard feeder for the birds, a habit that she hasn't yet gotten out of.  We all actually enjoy it now, and it's fun to watch them outside the window.

Unfortunately, though, birds are not the only things that like the seed she brings home.  A raccoon has recently been prowling our area, and the metal trash cans that we'd been storing the seed in got broken into, tipped over, and the contents devoured.

They were pretty basic trash cans, nothing fancy and no real latching mechanism other than the simple pressure that the lid exerts.


Amazon.com came through with some basic toggle latches - a pack of four was priced a little over $7.00


Installing them was pretty easy.  I put the lid on the can, hooked the top of the latch to the lid, and marked out where the bottom of the attachment needed to go.


With the bottom marked, I could then pull up the top of the latch and mark the holes for my screws.


Some sheet metal screws, which I originally purchased for the ductwork in the basement, tapped through the can pretty easily. Please note: chicken bouillon container sold separately.


Once the latch is secured, the lid should attach firmly.


Doing it this way caused me some problems, though - I originally had planned to drill through and use a nut and bolt instead of the sheet metal screws, and using them left some rather sharp and dangerous-looking points on the inside of the bucket, just waiting for some unwary wrist.


I thought about cutting them off with my sawzall, but the kids were sleeping and I knew it would make a racket, so ... 


I know.  Kinda redneck, huh?  I'm a little bit ashamed of myself, but the molly bolts left over from fixing the train tracks actually worked nicely.  

And, the end result is a raccoon-proof seed can!  


Tuesday, March 5, 2013

Storage Closet


 This is a project that has been on my list (literally) since the day before we bought the house. That's about sixteen months of waiting! It's also been about three months since I started the project, and it's only just been finished.


This was the way the room looked before: a little inset section and a weird little hutch thing.  We weren't terribly in love with the hutch, since it was extremely shallow and not much use for storing anything but paper towels.


First step was the fun part: pulling off the hutch.


Once it was off, I had to sand down and patch up the wall behind the unit (I may or may not have broken a hole in the wall while prying off the boards).  There were a few sections that needed help already, so no big deal.


Stud wall came next!  Since I was trying to extend an existing wall on the right, I set the front of the stud exactly 1/2" behind the front of the wall, to allow room for sheetrock.  I bought the doors ahead of time, and subtracted the width of the doors and the width of the facing trim from the total width of the closet to determine how wide to make the wall on the left.


The header was fun to build: start by screwing a top plate to the roof, then construct the actual header and rest it on the top of the 2x4s on the side.  Then you can cut the spacers to go between the header and the top plate.


Here's how to build the header:  cut two 2x4s to the right length, then screw them together with a series of 1/2" plywood spacers in between.  The width of a 2x4 is actually 1 1/2", so two of them plus 1/2" plywood equals the true width (3 1/2") of a 2x4.

Stand the header on edge, and attach it to the bracing studs.


I cut Sheetrock panels to fit over my new walls, and screwed them in place.


Cue my least favorite part!  The screw holes and all the joints needed to be mudded and taped (is that how you pluralize mud?) and smoothed until they are indistinguishable from the area around them.  I learned three very important things during this phase:

  1. No matter how much money you'd save, don't use the leftover mudding compound from the previous owner.
  2. If you get the tape wet (dip into a bucket or run under a faucet) before you apply it, you virtually eliminate bubbles.
  3. I hate mud.

At this stage, the project expanded to take on the whole room.  Since we had to paint over the new walls, we might as well paint all the walls.  Since we had to paint the walls, we might as well paint the baseboards.  Since we were painting the baseboards, we might as well replace the trim ... and so on. 


When it was all painted up, I installed trim around the closet.


 I needed facing boards for the top and sides, a board to conceal the hardware for opening the closet doors.  Then I added regular trim around the outside.  The inside trim was just white-painted boards.


Add in some sliding doors to hide everything (I think I put the door knobs in the wrong place), and the project is just about done.


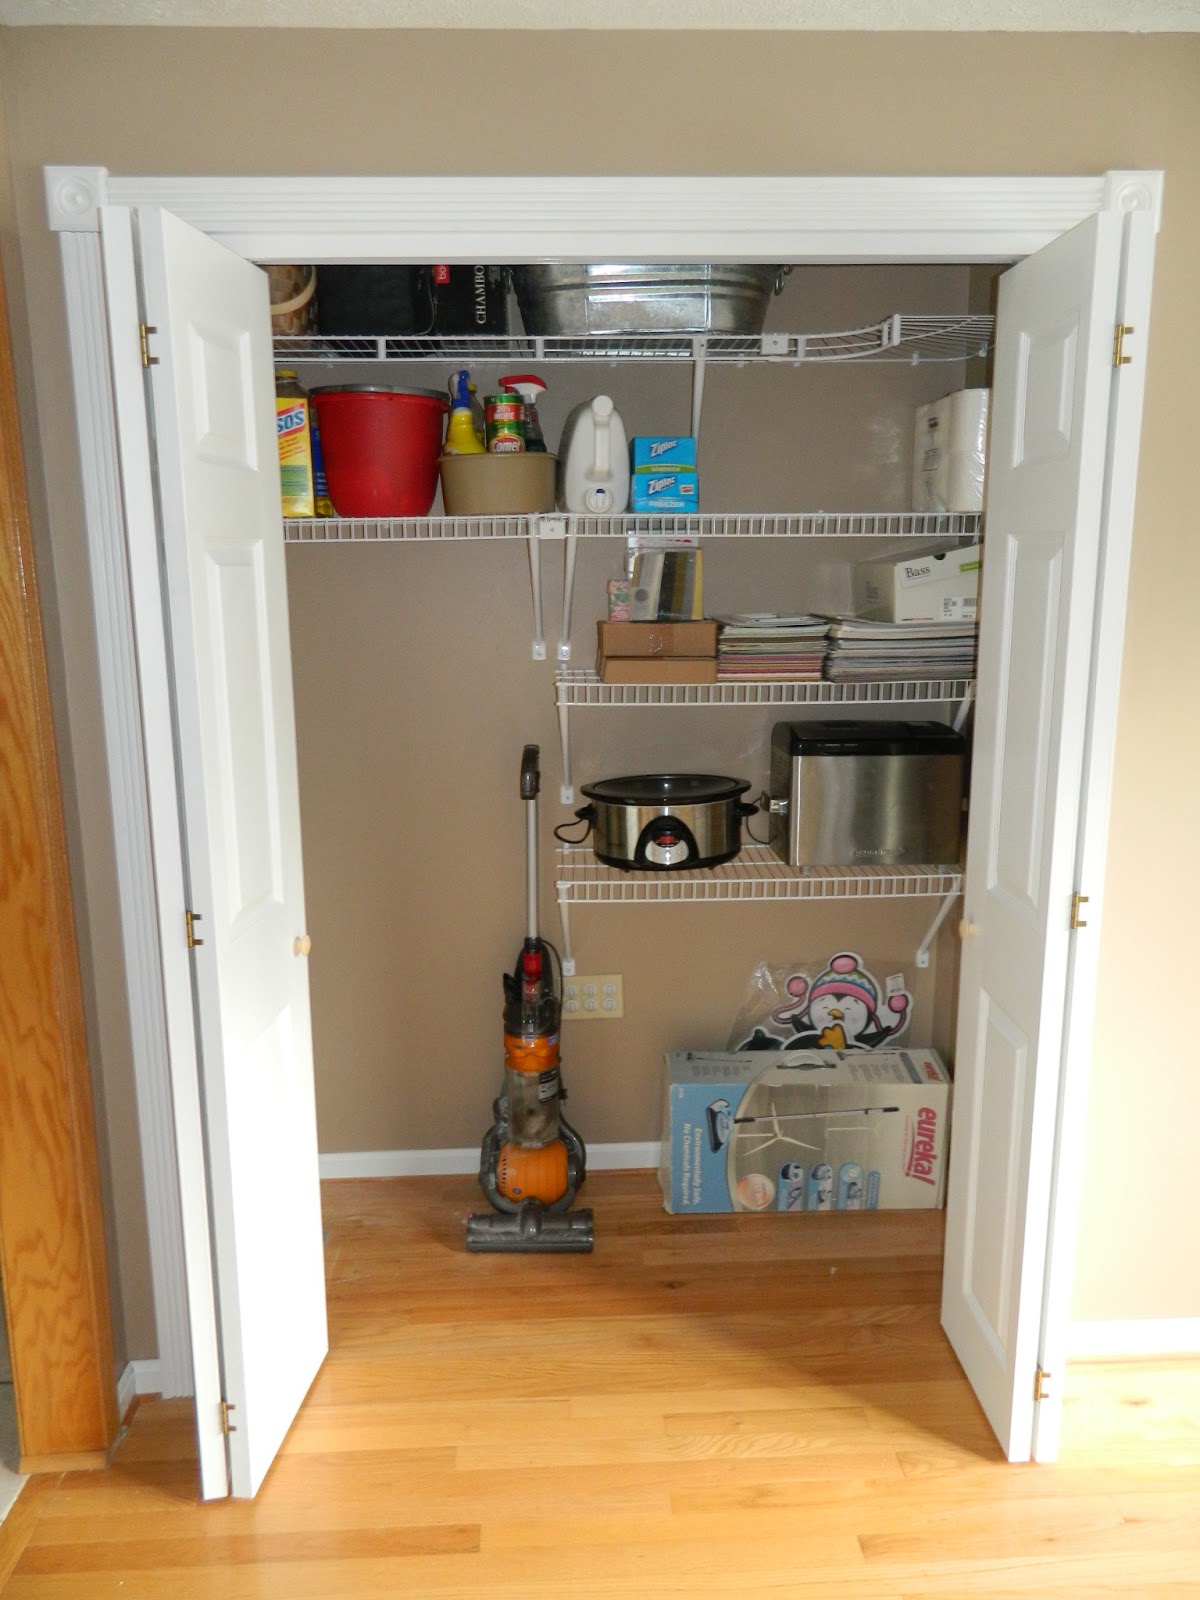
 We picked up some shelving at Lowe's, added a few hooks to hang brooms and aprons, and filled it all up!


 The space is so much more functional now!  The closet was worth the wait :)

Friday, March 1, 2013

Pallet Recycling Stand


I found a use for all the leftover pallets from my last project!  Since I don't have a garden, vegetable stakes were out (though my mother-in-law has a garden ... hmmm ... want some stakes for Mother's Day? Useful  for both vegetables and vampires ...)

Samantha gets the credit for the original idea: one day when putting an empty carton in the recycling bin, she told me it would be very nice to have some sort of high stand to make it easy for us to lean over the railing and place stuff into.  I thought "a use for my scraps!" and the idea was born. 

So, I came in with three requirements: first, to use only pallet scraps; second, to have room for both bins, with the top one accessible to load; third, to have some method of corralling the cut-down cardboard boxes that get piled next to the trash can waiting for recycling day.


I had plenty of leftover scraps, as I mentioned before.  I had the center pieces from about four pallets, and nearly a whole pallet's worth of face pieces.  That made things both easy and hard: easy because I didn't have to find (or spend money for) the lumber, and hard because the lumber was full of cut-off nails and not square.


Getting the post pieces ready involved a lot of careful cutting.  There were nails all over most of my pieces (when I was preparing the pallets for my other projects, my attention was naturally on the face pieces, not on saving the centers for later use).  I didn't worry about getting the pieces all the same, just on cutting down what I had to usable dimensions.

Once I had six posts (two tall to bracket the cardboard slot and to make the far edge of the recycling area, two short for the near edge of the recycling area to allow easy access to the top bin), I used my new toy dado blade set to cut grooves for the two 'floors' of the stand.


Make this to fit your own recycling bins: mine fit nicely within an 18" tall frame. 


More scraps were cut to width and length to make parallel trusses to support the two floors and provide some stability to the posts.


Once I had the 'frame' laid out and nailed in place with my brad gun, I started adding the flooring and siding using the pallet scraps I had left. I made the pallets square to each other using the process outlined in this post, then nailed them in place.


It didn't take long to get the floor done, and then enough side pieces to provide the cardboard section with some stability.  One thing I wish I'd done was keep a few pieces to wall in the base of the cardboard slot: after a couple weeks of use, I noticed that skinny pieces tend to slip out the sides at the bottom.  Next time I've got a pallet under deconstruction, I'll add more there.


I added some rails on the bottom to guide the bins into place and stop them when they get to the end.  That keeps it nice and tidy in the garage!  Just position the bin in the open area where you want it, and lay the guide boards right next to it and nail them in.


To my eternal shame, my garage used to look like this:


 But now it looks like this!
 

A small difference, but it still gives me a twinge of satisfaction every time I take the trash out and think "I made my house more organized!"  Which is weird, I know, but it's how my brain works.  Every project in the house makes it that much more 'mine.'

I'd only change two things about the project: I'd add more pieces to the bottom sides of the cardboard section, and I would use 2x stock to make the posts.  It's cool to say that it's all re-claimed wood (in keeping with the whole recycling thing), but it honestly, cutting around the nails made it more complicated than it needed to be.  The 2x stock would provide more stability, too.

Tools:
Table Saw (dado blade helps but isn't necessary)
Chop Saw
Brad Nailer

Materials:
Nails
Pallets!

Saturday, February 16, 2013

Table Saw Drawer


My psychotic organizational side is very pleased with this project.  Simple and short, it nonetheless managed to make my life a whole lot easier and my shop a whole lot more organized.  I got to try out a couple of new things, as well, and in the end I'm pretty happy with how it turned out!

I got the idea from an issue of ShopNotes magazine (#70), a companion publication to my usual favorite Woodsmith.  They had a two-page article on adding a simple drawer underneath one wing of a table saw. I knew as soon as I saw it that this would save me tons of trouble - push sticks, extra blades, wrench, my new stacked dado set, and a whole bunch of other things that normally clutter up the floor next to top of the table table saw would have an out-of-sight but easily accessible place to live!

The project had only three parts: the case, the drawer, and the mounting brackets.


Case
It's pretty simple - a top, bottom, two sides, and a back.  I used three sheets of half inch 2'x2' plywood that my wife spotted in the Home Depot clearance bin for $1.00 each.  I cut the case sides 5" wide (leaving the length at 23 7/8"), and the case bottom and top 10 1/2" wide.  The bottom and top measurements depend on how much space you have between the edge of the table saw and the on/off switch - my measurements are based on a Delta contractor's saw.

Once it was cut to size, I set up my new stacked dado set to cut tongue and dado joints (Google just found me a video demonstrating the process here).  I cut a tongue on both sides of the top/bottom pieces, and matching grooves on the top and bottom of the side pieces.


Glue and clamps put the case together, and I put in a few nails with my brad gun for good measure.


Once the glue has dried, cut a board to just fit in the back and glue/nail it in place.


Drawer
This part was almost as simple: two sides, two ends, and a bottom piece.
Sides: 23 5/16" long, 4" wide
Ends: 9 5/16" long, 4" wide
Bottom: 22 1/2" long, 9 1/2" wide.


Tongue and dado again, cutting dadoes on the bottom of the end pieces and the bottom and sides of the side pieces, and cutting tongues on the sides of the end pieces and all around the bottom piece. 

Assemble the drawer (do a dry fitting with no glue first, and test the result to see if it slides easily into the case).  Once you're happy, go ahead and glue/clamp/nail it.


The drawer is almost done now: my next step was to add a false front to the drawer, a nice-looking face piece that will be the visible part of the drawer.

I had a spare scrap of 1x6 that I cut to match the open width of the case (NOT the drawer). It should be roughly 1/2" larger on every side than the drawer.  I think it ended up being 5"x11" on mine.

Cut it to size, then use the table saw set at a 45 degree angle to cut a chamfer all the way around the facing side of the drawer.


Clamp it in position sticking out 1/2" beyond each edge of the drawer (note the spacers on the side to make sure the distance is right - I put the drawer on top of scrap 1/2" plywood to make sure it was correct), and screw it in place from the inside.


That finishes the drawer, except for one small detail: the handle.  You can use any cabinet or drawer handle for this, but I chose to try making one out of a scrap 2x3 piece just because I could.  I got the idea from another Woodsmith issue (#205), but forgot to take pictures.  Essentially, you set the table saw blade at different heights to create a scooped hollow in the middle of the blank, then smooth down the cuts (I wrapped a piece of sandpaper around the handle of an old foam paintbrush).  I can do a blog post on that if anyone's interested in seeing the details.


Mounting Brackets
Two of the brackets (on the outside edge) are straight, while the other two (on the inside edge) have a short lip on one side.  I wound up using a piece of aluminum angle (2"x2"), and cutting it to size with my table saw using a junky old blade I don't care about and being careful to clean up afterwards.

According to what I've read, the key to cutting aluminum with regular tools is to go slowly, use plenty of eye and ear protection, use a blade you don't care too much about (and clean it afterward) and avoid any chance of kickback.  With that in mind, I set up my table saw carefully.

My first cut was made just to the inside of the angle, 4" deep into the aluminum angle. This gave me the start of the two straight pieces.


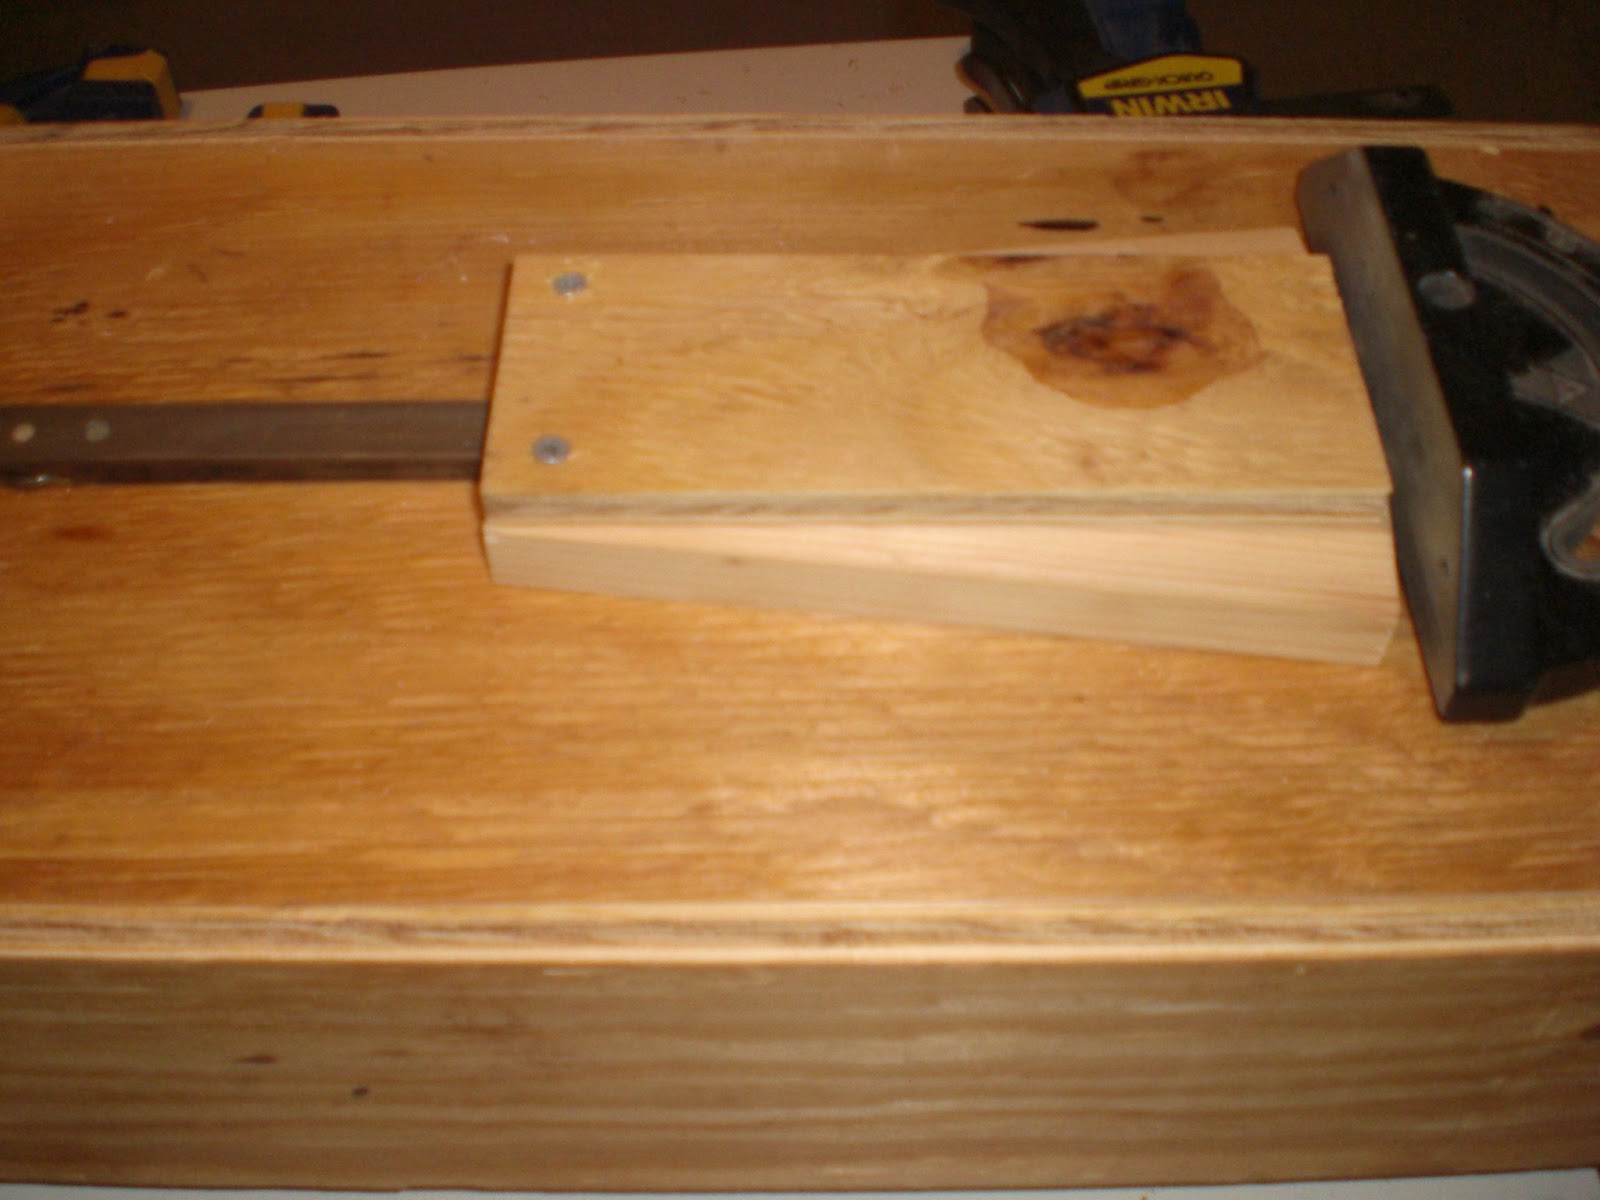
Next, I used the fence to mark the 2" line and clamped the aluminum to my miter gauge.


Cut off the two straight pieces, then reposition the aluminum to cut off the two angled pieces.  If you want a smaller lip on these, make sure to slice the aluminum before separating the small pieces from the larger stock.  It's safer to make cuts on a long piece than a short piece.

Use a file to smooth away any burrs or sharp edges.


Once that's done, drill a hole in the top of each piece large enough to fit the bolts holding your table saw's extension wing.  Then drill smaller holes in the bottom of the two straight pieces large enough to fit a single wood screw.

Mount the aluminum pieces on the table saw (straight on the edge, angled on the inside with the angle pointing out towards the other pieces.  Measure the distance between them and cut out two pieces of wood to fit inside, with a kerf on one side wide enough to sit on top of the "ledge" formed by the inside angled pieces. Sorry, I didn't take any pictures of the brackets themselves!

Screw them to the top of the case, leaving enough space on the outside that the aluminum bracket will be flush with the edge of the case.  Once these are mounted, you will be able to set the block on top of the inside (angled) mounting bracket, then screw through the outside (straight) mounting bracket into the side of the mounting block.


The drawer is now ready to mount!  But I decided to make one modification to the design, to see if I could make my life one little bit easier.  My miter gauge is always hanging around on top of the table, and I wanted to set up a way to store it.


Miter Gauge Holder
I  cut a long, shallow angle into the sides of two scrap pieces by screwing them onto a piece of plywood and running it along the table saw (you can just barely see the pencil marks on the plywood).


Those got mounted on the underside of the case, just far enough apart to fit the bar of the miter gauge.


NOTE: if your miter gauge has a protrusion on the bottom (to lock it into the miter slot), you'll need to kerf the bottom of the two side pieces so it fits.

Then cut a piece of plywood to fit as a cover over the scraps - this will end up being the bottom of the miter gauge holder.


Done!  Now I can just slide the miter gauge into the holder, and the angles will guide it into place.


Finish
My drawer is ready! Slide the mounting blocks over the angled brackets, use a clamp to hold it and bring it level, then screw the side brackets into the mounting blocks and it is ready for use.


I seriously love this project!  It's already coming in so useful, keeping all sorts of little tools near my table saw but out of my way.


Materials: 
Two and a half sheets of 2'x2' 1/2" plywood.
Eight inches of 2"x2" aluminum angle
Twelve 1 1/4" wood screws
One foot of 1x6 pine
Two feet of scrap 2x4
One pull knob

Cost:
Plywood - 2 1/2 sheets of 2x2 @ $1.00 each - $2.50
Aluminum - 8 inches @ $20.00 per four feet - $3.34
Pine - 12 inches @ $20.00 per ten feet ~$2.00

Adding in scrap, the entire project was less than $10.00 in materials used.  If I'd bought everything at the minimum sold length, it would come in at more like $35.00 - but since that will be used in other projects, I don't worry about it.