

Samantha has wanted to "frame" a picture between shutters ever since spotting something similar at a friend's house several years ago. With all the different projects going on around the house, this seemed like the perfect time to do that for her - but finding shutters the right size was hard. Very hard. We already had the pictures, so we were locked into a specific length; and that length just wasn't available at anything near a reasonable price. So, we decided to get creative.
CONSTRUCTION
At first, I considered building them from scratch. There are a number of router jigs that can do the paneling, but purchasing one was even more expensive than buying the shutters, and building one seemed like a lot of work.
Our basement was pretty much empty when we bought our house, but way in a back corner, tucked behind a pile of dusty screens, was this incredibly ugly floor-to-ceiling shutter.
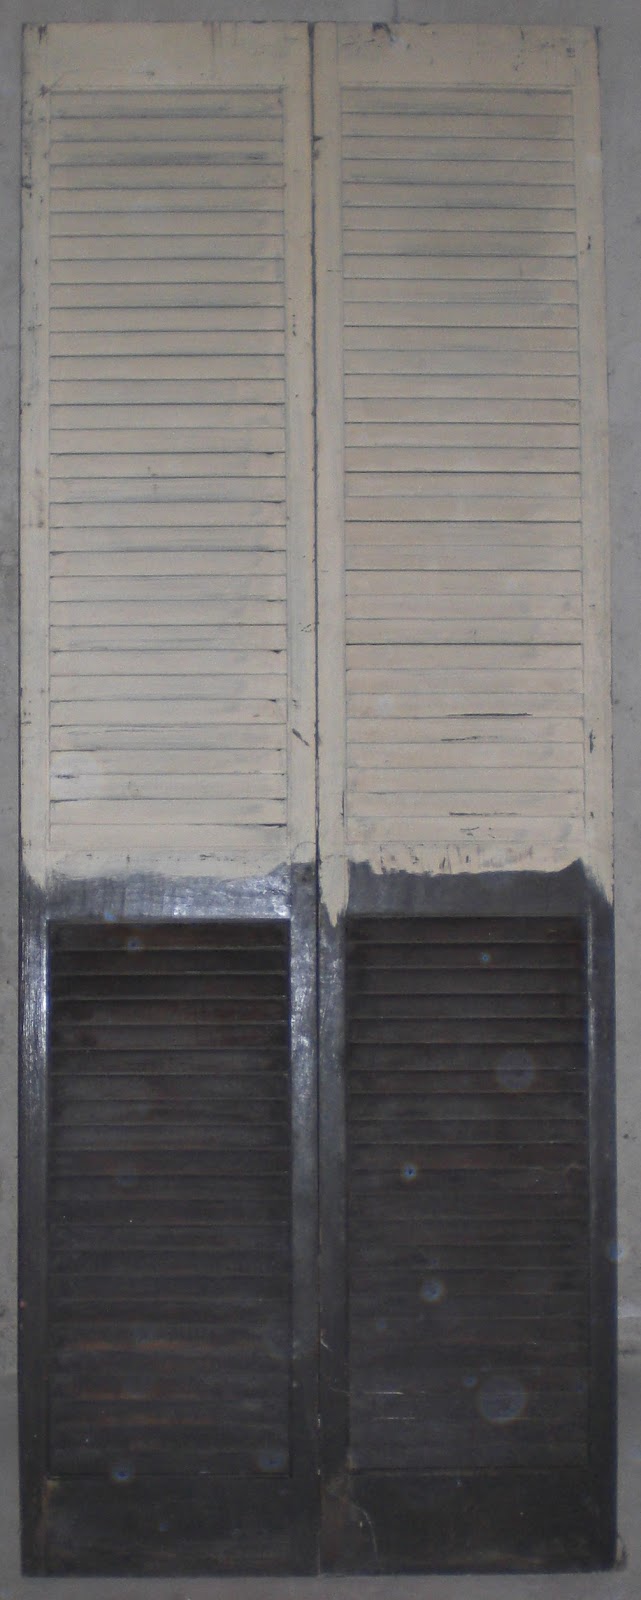
We have no idea where in the house this once hung, or what on earth possessed someone to try painting the bottom half black. But we knew we could use these to frame in our pictures.
Step one was to cut the slats free of the side rails. I tried two different ways of doing this; one involved a couple of bar clamps anchored to walls pulling the shutters apart, and the other (simpler) way involved me running the shutter through the table saw, just to the inside of a rail. I'd actually recommend a third way (using a handheld circular saw), since the table saw flung a slat at my head as I was finishing the last cut. Lesson learned: don't do that again. Also, that is why I always wear ear and eye protection down in the basement, no matter how ridiculous the glasses look.

The slats weren't glued into the rails, so once they were cut they just came free. I used the miter saw to cut the rails just shy of the horizontal separators.

Next, I set up the miter saw (using a stop block clamped to the rail) to cut the slats to the appropriate length. We eyeballed it and decided that the fully assembled shutter should be eight inches wide, so the slats ended up around five inches long.

I cut a bunch of the slats to the 5" width, then inserted the freshly cut ends into one of the rails.

Next, I used a mallet to tap the other rail onto the slats, then used the miter gauge on my table saw to square up the "top" end of the shutter.

We decided that we wanted the horizontal separators at the top and bottom to be the same width as the visible portion of two slats, so I ripped the original separators down to 2.5" thick, and cut them to be just a little shorter than the slats.

The rails had a slight ridge on the inside, so I had to cut a wide dado on each end of the separator. My table saw wouldn't accept a stack that wide, so I cut it in two passes, flipping the piece around between each.

Final assembly was simple enough; I set the separators in place at the top, inserted slats until I reached the desired length (24" minus 2.5" for each separator = 15 slats), and set the next separator in place.


Once it's set, tap the other rail into place, apply glue to the sides of the separators, and clamp it down. Since I didn't have a lot of glue surface, I also drove some finish nails in through the side of the rail to hold everything in place.

I went back to the table saw, trimmed off the rail that was sticking out past the top and bottom pieces of the shutter, and the construction phase was done!
PAINTING
After the successful distressing method we used on the Display Tables, we decided a little bit of antiquing was in order for these shutters as well. Samantha wanted brown layered on top of black, and since we already had some brown spray paint, I agreed (plus, she's better at anything related to color).

We sprayed on a coat of black paint ...

... then added some Vaseline ...

... and finished off with a couple of coats of brown spray paint, then wiped it down to expose the black paint underneath the Vaseline.
HANGING
Now that the shutters were painted, I went back to the basement to add some hardware. I had a little kit of picture hangars, but annoyingly enough, it only had two of each kind. Not wanting to use different methods of hanging, and in keeping with the general theme of recycled products, I made my own.
First, I marked the centerline of the shutters 1.5" below the top. Then, using a pair of needle nosed pliers, I hammered a staple into the shutter right on the line.

I also tried firing a staple directly from the gun into the shutter, with the stapler set on top of a flathead screwdirver to keep the staple from going all the way into the shutter. That worked, but it was hard to get the staple exactly on the line so I went back to the pliers.
Since we wanted to use the current position of the pictures to determine the location for the shutters, I used Post-It notes on the wall to mark the top, sides, and centerline.

I drove a pair of nails a little way into the top of one of the scrap slats, then drove a small nail (the same ones I drove into the wall) most of the way through the slat. I used a pair of snips to cut off most of the point of the nail, leaving about 1/4" sticking out past the back side of the slat.

I hung the shutter on the small nail, then held the slat up against the wall by the two "handle" nails. Once I liked the position, pressing the shutter into the wall pushed the little cutoff nail into the wall, creating a hole to show me where to drive the hangar nail.

Take the shutter off to see where everything is, then pull the hangar out of the wall and drive in a nail to permanently support the shutter.

Rinse and repeat for everything else, using a long level to make sure everything is even, then hang the pictures in between and you're done!


The Vaseline spots are a little shiny when they catch the light, so we're going to wash it again with some soap and hot water to see if it takes care of the problem. I really liked this project - it was fun to take something old and ugly and rebuild it into something that looks great!

Tool List:
Table Saw (a circular saw and miter saw could do everything but ripping the top and bottom pieces to width, and cutting the dado)
Circular Saw
Miter Saw
Clamps
Level
Hammer
Mallet (a hammer and block of wood would also work to avoid damaging the slats/rails)
Material List:
Old shutters (taller and wider than your end goal)
Spray paint (less than a can each of brown and black)
Vaseline
Glue
Nails
Staples
No comments:
Post a Comment