
I can't claim any credit for this particular project - it's lifted almost exactly from a truly fascinating website, ibuildit.ca. I had some shaping to do for a Christmas project, so I needed a quick way to do some sanding while keeping two hands on the workpiece. A table-mounted belt sander would be the permanent solution, but this quick stand for my regular belt sander does the same trick for the cost of some scrap plywood, a little hardware, and some 2x stock.
I followed the instructions at this website, with only minor changes. I didn't go to the final step of creating a fence for the sanding belt, since I didn't need that for my project - that's something I will likely add later on down the road.
To start with, I ripped a 2x2 sheet of 1/2" plywood in half, with one half set aside for the fence (later) and the other half to serve as the platform's base.

Once I had the two pieces equal widths, I cut some spacer blocks and clamped the belt sander between them to mark out the locations for the holding blocks.


Once I had positioned and marked the pieces, I unclamped the plywood sandwich and glued the block into place.


I glued both pieces at once, and let them dry clamped in place.

Once the glue was dry enough to secure the piece, I flipped the plywood over and sank several screws into each block. Definitely drill pilot holes first, as you're going into some weak grain on the two-by-fours and you don't want it to split.

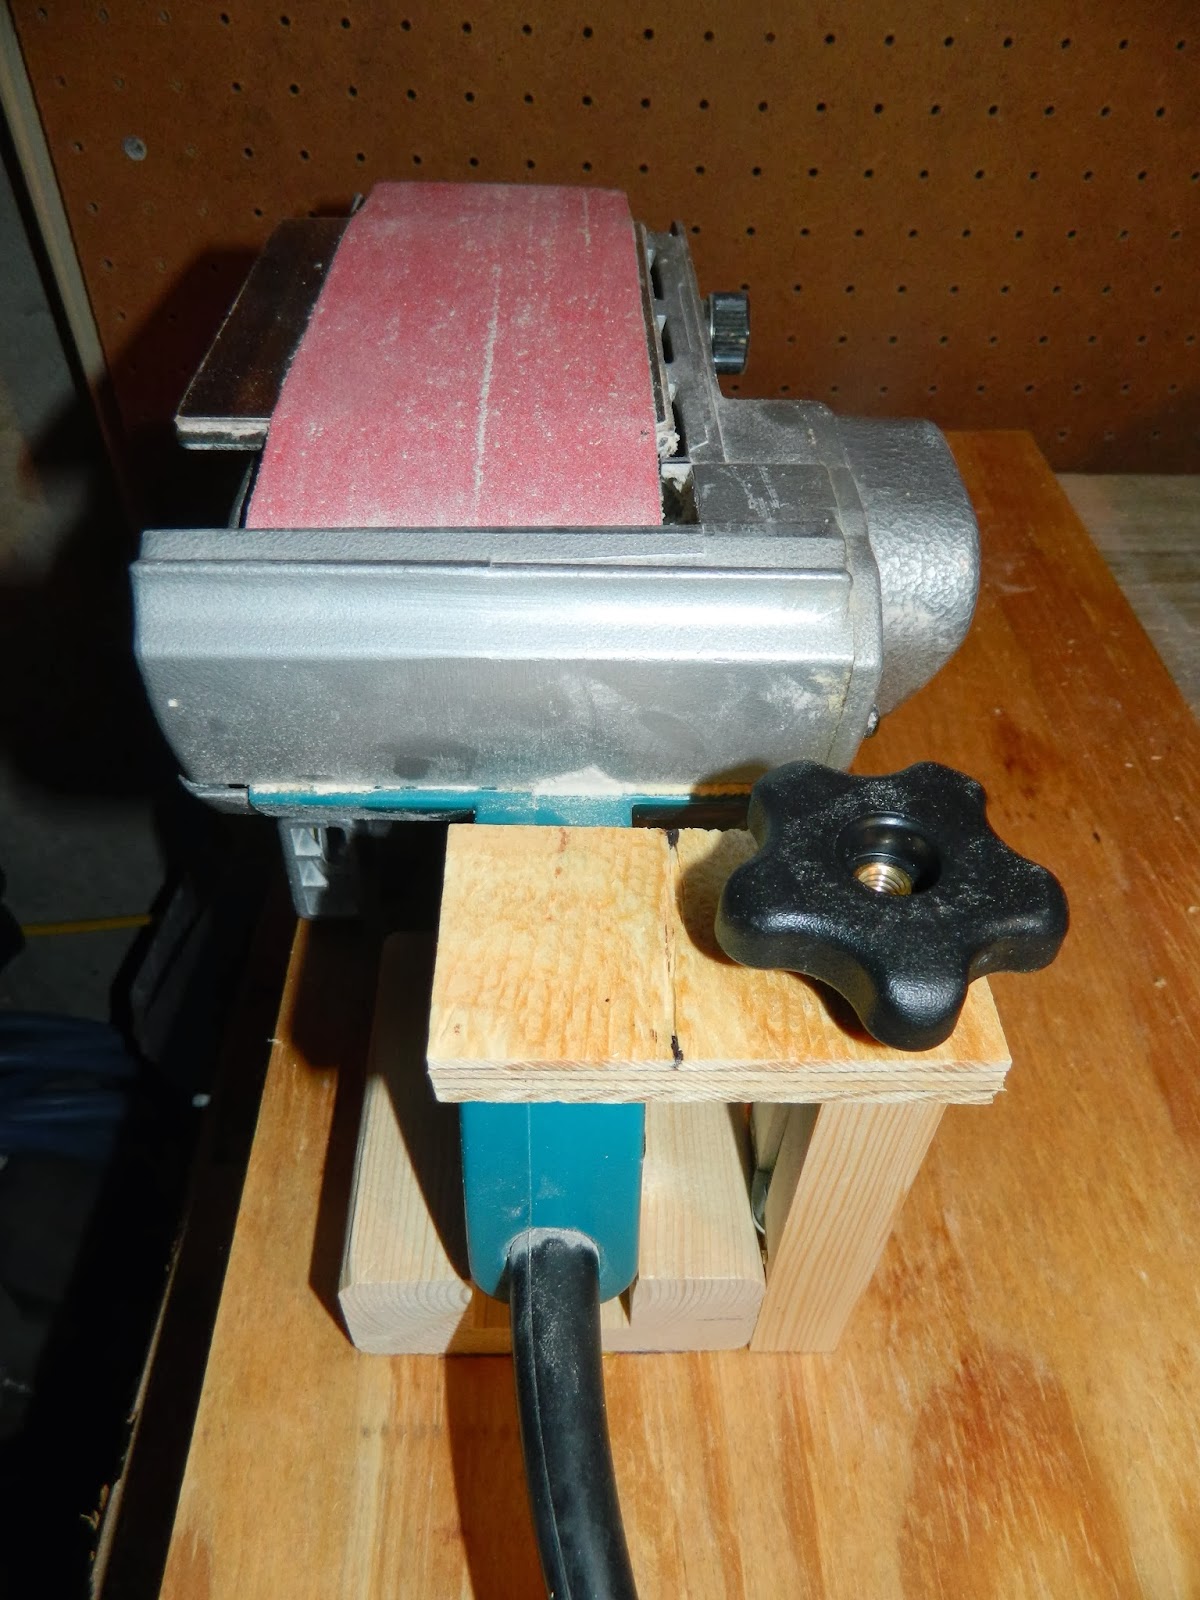
Once the screws are in, the cradle for the handles is ready to go. The blocks should be positioned so that you can slide the front handle into the long piece, then drop the back handle in to nest into the short piece.


The sander is now cradled, but it's not secured. In order to lock the sander in place, I needed to add in a tall post next to the rear block. Cut a scrap piece to be just shorter than the handle.

One the post is cut to size, I sliced a groove through the center of the post to hold an inelegantly-named-but-still-useful toilet bolt. A little work with a chisel / drill bit notches out a spot for the head of the bolt - make this parallel to the side, deep enough so that the entire head of the bolt sits in the block of wood. Position this so that the end of the bolt sticks up at least 3/4", and so that the head of the bolt is less than 1.5" from the bottom of the block.

Now place the bolt in the slot you just cut, then position the post against your handle rest. Note that the head of the bolt is lower than the handle rest, which means that the bolt will not be able to twist.

Drill a hole in a scrap piece of plywood and add a knob to the top, then tighten the knob to lock the belt sander's handle in place!


Total time - maybe a couple of hours, not too bad! I'd like to add the fence at some point, and then maybe just spray paint the whole thing, but for a quick project this worked great!
Materials Needed
1 - 12" x 24" plywood (base)
2 - 2" x 4" x 6" scrap (for handle cradles)
1 - 2" x 2" x 4" scrap (for hold-down post
1 - 2" x 4" plywood (clamp arm)
1 - toilet bolt
1 - star knob
8 - 1.5" wood screws
Glue
Tools Needed
Table Saw (for grooves, I recommend a dado blade): chisels could work too, just take longer
Drill
Belt Sander (table wouldn't be much use without one, right?)
Chisel
I need more articles and blogs please post soon. Sliding Compound Mitre Saw
ReplyDelete