

Part One of a three-part series (Go To Part Two, Part Three)
This project doesn't quite take the top spot (that still belongs to the Farmhouse Table), but it has it's own reason to be special. Unlike the table (and the Sawhorse Desk currently being finished), this is a design I had to come up by myself, though I definitely drew ideas from a number of sources (I'll include links below).
While browsing through the always excellent site TommyAndEllie.com, I ran into this post about a pallet headboard he had built. Samantha immediately thought of Johanna, since she has said that pallet projects are cool.
Building the headboard out of pallets became my first requirement for the project, but almost as important was the need to build it using knock-down joinery, so that it can be disassembled and moved.
I started with how to join the rails to the head and foot boards. I've been reading back issues of Woodsmith magazine for the last few months, and though it would be fun to try a mortise and tenon joint (an easier methodology might be to just use bed rail fasteners). With a mortise (shallow hole) cut into the posts, and a tenon (slight protrusion) shaped on the end of the rail, the piece would lock together and provide good vertical and lateral support for the rails, preventing them from dropping and twisting.
Cutting the tenons looked easy; after the notching I did for the table, I knew I could trim excess from the rails using my table saw. The mortises, though, required a little more work.
For consistency, I decided to build a mortise jig to use with my router, constructed out of some scrap plywood and 2x4s. The underside of the jig has three pieces of wood, with the two side pieces placed 3.5" apart and a third piece placed to hold the end of the stock.

A piece of 3.5" stock (I used 2x4s to set all this up, but it works just as well with 4x4 posts) gets placed between these stop blocks.

The top side of the jig has four pieces of plywood screwed down to provide guide bumpers for my router. I cut an opening in the plywood, then marked the position of the mortise on my scrap piece, and used those markings to get the plywood bumpers positioned. Measurements got me close, but there was some trial and error involved - use scrap 2x4s until you have it right. Remember that your router base may not be perfectly square, so you need to be sure the router is always set in the same way.

Once it was set, I was able to use my plunge router to take successively deeper and deeper cuts, until the mortise reached a depth of 1".


When the scrap pieces were perfect, I drew up my plans for the bed frame. After exhaustive research and much careful consideration, I decided that my two headboard posts needed to be 51" high because that was the size of a leftover piece of scrap I had. I cut the stock to match (note: I cut this a little long and then trimmed it to the right length so the cuts would be square).
I also cut two posts for my footboard out of 4x4 leftovers. I figured the distance I wanted from the floor to the rail bottom (8"), the size of the rail itself (~7.25"), and how far above the rail the post should extend (1"), and cut the footboard posts 16.25" tall. I then routed the mortises into all four posts.

With the posts complete, I began assembling the head and foot boards. This would be a queen bed, so I needed to fit a width of 60". My headboard needed two 2x4s at the top and bottom of the frame, with vertical 1x3s providing support for the pallet pieces. I cut two 59" 2x4s, and five 32.5" 1x3s, and drilled pocket holes using my Kreg Jig (since these boards won't be visible). I attached the 2x4s to the posts, then put in the vertical pieces. Both the vertical and horizontal supports were set exactly 1/2" back from the front edge of the posts, so the pallet pieces would be flush with the front edge of the posts.

One mistake I made - I attached the vertical supports from the back, so the pocket holes angled toward the front of the headboard. I had to re-do it from the front, since the screws were so close to the front edge of the 2x4 that bumping them caused a couple to rip out.
That finished the skeleton of the headboard. The footboard was even easier; I cut a 59" piece of 2x8 and set it up between the footboard posts, with exactly 8" between the bottom of the post and the lowest edge of the foot rail.

I used pocket holes and screws to connect the foot rail to the foot posts.

Headboard done, footboard ready, and only the rails are left.
2x8 stock gave me a nice amount of strength. I cut them a little large (a queen mattress is 80" long, so I cut my rails 83" long) to give space for a 3/4" tenon on each end and room to slide the mattress in.
To cut the tenon, I set the fence on my table saw to 3/4" away from the farthest edge of the blade, with the saw 1/2" up from the table. I then made repeated passes on both sides of the rail until the tenon cheeks were formed.

Once the longer sides were cut, I raised the blade slightly to make the cut on the 'top' and 'bottom' of the tenon. This should be customized to whatever length you routed earlier - I used scrap pieces until I had a perfect fit with my mortises, and only then started cutting into the rails. Start with the blade a little lower than you need, so you can sneak up on the final width.

I now had a square (well, ractangular) peg and a round hole. Oops. My tools failed me here; I had planned to chisel the mortise square, but didn't have one small enough to fit the hole. I changed tacks and rounded off the tenon to fit my oval mortise.
I used a 1/2" roundover bit on my router to waste away as much as I could, then used a hand saw and sandpaper to fit the rest into the hole.

ADD PICTURE OF COMPLETED TENON???
Once I had a snug fit, I added a long supporting piece to the rail. I had some nice 5/4 (a true 1") stock from somewhere, so I ripped it to a width of 1" and attached it flush to the bottom of the rail to provide a rest for the slats.

Using our spare bed as a reference, I added more pieces on top of this to create hollow pockets where the bed slats would rest. It's kinda hard to tell from the picture, but you can see a scrap 2x4 acting as a spacer where the slat will be, then a piece in the middle, then another scrap piece. I used 12" pieces on each end, with 10" pieces filling up the spaces in the middle. To make sure these match, the rails need to mirror each other - lay them out next to each other with either the bottom or the top edges touching (NOT bottom edge to top edge). Lay the first (12") piece on each of them, attach it, then start using scrap pieces and the 10" strips to position the next rails.

Last of all, I needed to somehow pin the rails to the posts. The mortise and tenon provide great lateral and vertical support, but nothing horizontally.
I sketched out a plan for this one night, then read a Woodsmith article the next day showing the exact same methodology. The basic idea is to drill a hole through the post and into the end of the rail, then drill an access point on the inside of the rail big enough to thread a nut onto the end of a bolt.
With the rails securely placed in the posts (I used my 10' bar clamps to squeeze it tightly), I drilled a 3/8" hole through the post and into the rail. I was able to use the bit that came with my Kreg Jig for this, and drilled two holes for each end of the rail. I think one would have done just as well.
When the hole was done, I took the rails out and began working on the access point. To prevent the two holes from weakening the rail, I used 5" and 6" bolts, with the 6" bolt on top.
Measuring back 2 1/2" from the edge of the rail (1 1/2" for the lower), I drilled a shallow hole using a 1" diameter paddle bit. I went slowly, since the last thing I wanted to do was punch too deeply; stop when the point of the bit breaks through the 3/8" hole you already drilled.
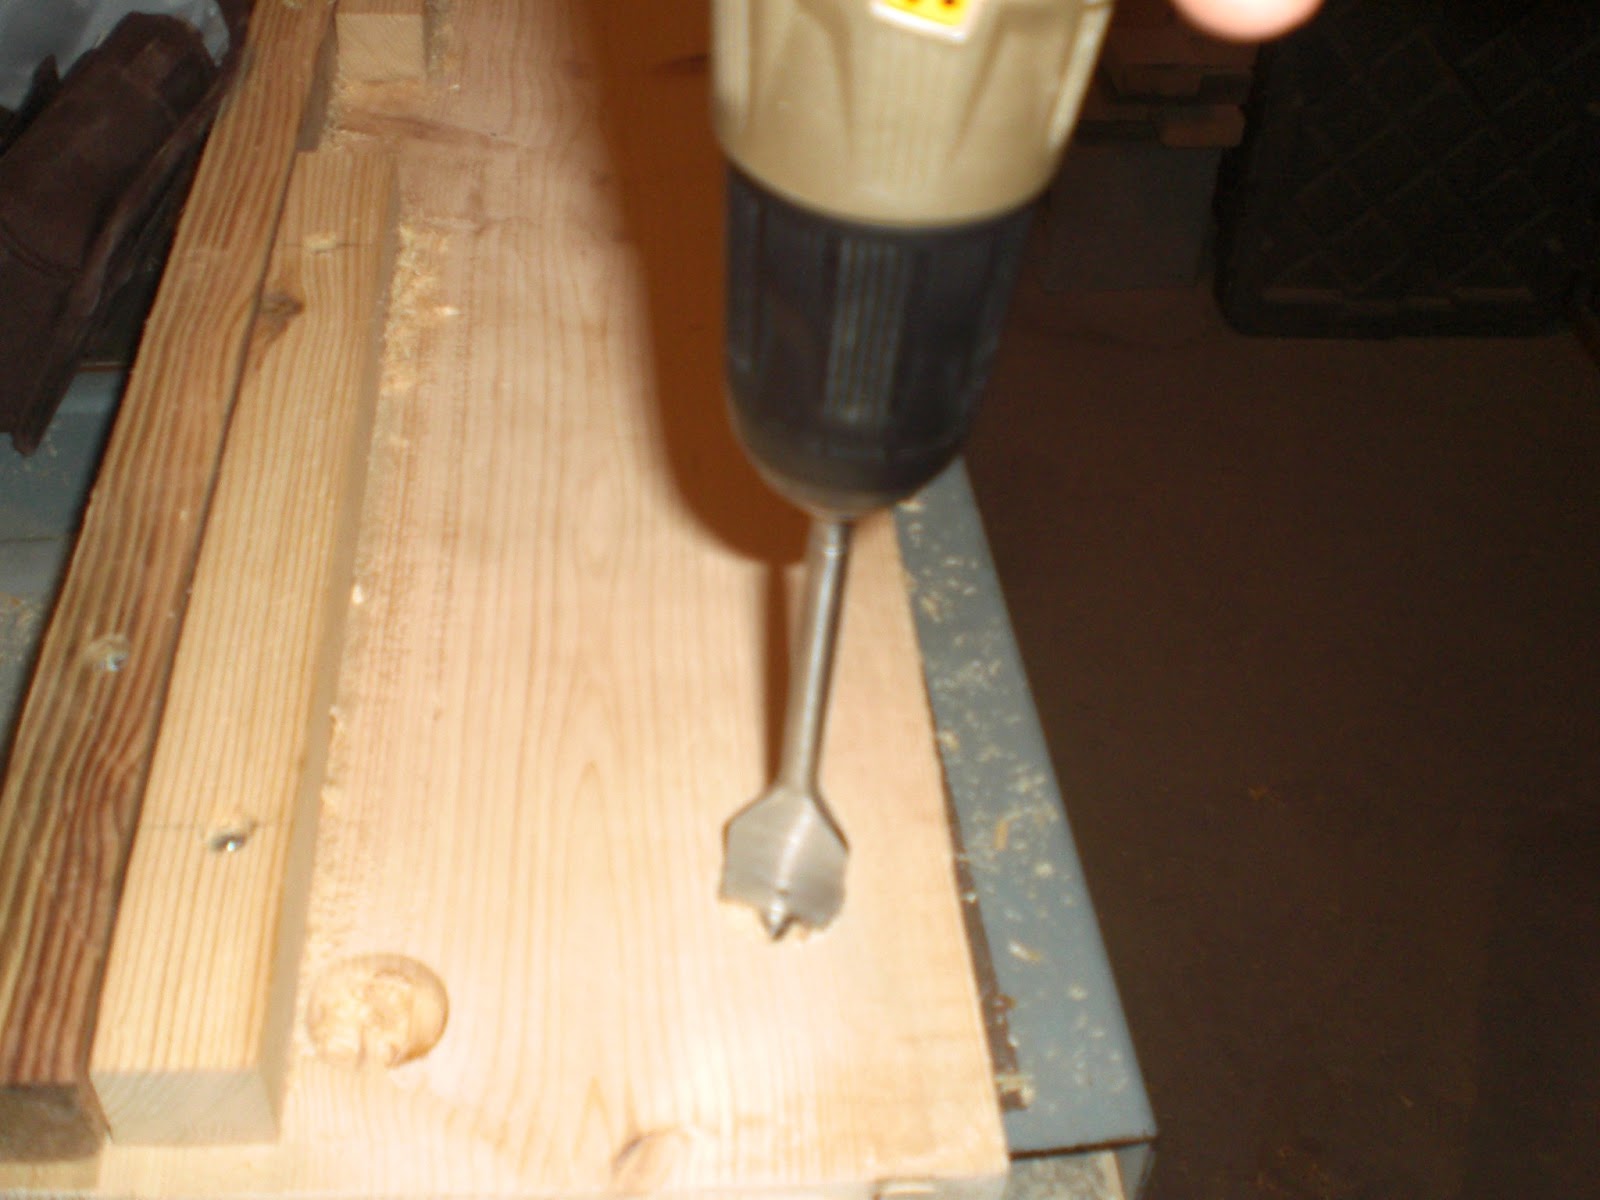
Using a regular drill bit, I cleaned out and deepened the back edge of the hole

Use a chisel to square off and deepen the hole enough to insert a square nut and tighten the bolt through. Make sure your shaft is deep enough to allow the bolt to tighten fully.

I also drilled into the post using the 1" paddle bit deeply enough that the bolt head and a washer are completely underneath the surface. That way clothes and such won't catch against the bolt heads when the bed is assembled.
Pretty close to my diagram!

That's quite long enough for Part One! I'll put up details next on finding, disassembling, preparing, and attaching the pallet pieces to the headboard.
See Part Two
See Part Three
Tool list:
Table Saw
Plunge Router
Miter Saw
1" straight router bit
Drill
Kreg Jig
Chisel (1/2")
Hammer
1" paddle bit
1/2" drill bit
10' pipe clamps
Materials:
3 - 2x8x96
3 - 1x3x96
2 - 4x4x96
2 - 2x4x96
~50 1 1/2" screws
Idea sites:
TommyAndEllie
Ana-White
Ana-White again
Loved the bedframe, Hope J did too. What is next? mimi
ReplyDeleteThis is really a nice and informative, containing all information and also has a great impact on the new technology. Thanks for sharing it, headboard accessory
ReplyDelete